


Articles » Problem Solvers Latest Edition » KITCHEN MAKEOVER On a Shoestring Budget
Yes, you can! (oh no… not that phrase again!!!)
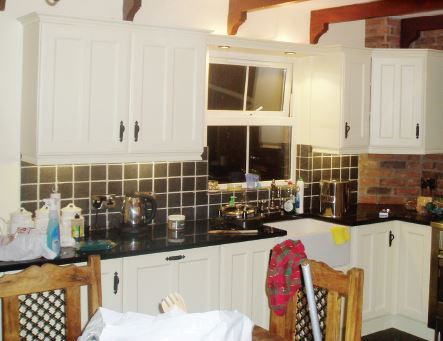
A new trend is repainting kitchen cabinets from the darker wood look to warm creams etc. When you know the tricks, this is a very simple and low cost job. Here it is in a nutshell:
Wash all cabinet doors thoroughly using a good cleaner like sugar soap. Rinse and allow to dry. NO SANDING REQUIRED… phew!!! Thank God for that. Apply a coat of a fantastic proven product called ESP using clean cotton or lint-free cloths. Make sure you put ESP on every single piece of surface you intend to paint because areas missed will give you problems later.
Leave the ESP to cure for at least 2 hours at normal room temperature and you are ready to paint. You could wait for a few days before continuing if something ‘pops up’. (Only problem is you run the risk of dirt contamination on the surface the longer you leave it)
Next you’re ready for paint. We recommend a good quality oil based satin finish paint used in conjunction with Owatrol Oil. You could also opt for Eggshell or Gloss if you like those.
Melamine cabinets (or any melamine surface) are a doddle to repaint using ESP / Owatrol Oil method.
The trick is, add about 33% Owatrol Oil into first coat of paint and apply. Leave for 24 hours and apply a second coat of the same paint – this time with just enough Owatrol Oil in it to make it flow out beautifully with NO Brush marks or streaks. Allow 24 hours to dry and at least a week to harden before you give it a hard time.
Note: It is possible to paint worktops in the same way, but be aware, worktops are subject to a lot of abuse, cutting etc and unless you are extremely careful avoid painting the worktops.
The final finish will be both beautiful and tough. The use of Owatrol in the paint will add elasticity to the finish thereby minimising paint chipping from bangs, etc.
PAINT YOUR WOODEN FLOOR ANY COLOUR
If you want to make that wooden floor really stand out from the crowd, paint it any colour you would like. Here’s how.
For best results, sand the floor to remove all previous floor coatings.
Option A: You can paint the floor with any household emulsion / any colour by mixing it with E-B. Mix 1 part E-B to 2 parts Emulsion – first coat only. In most cases you will have the job done but if you require another coat, apply it without the E-B. When dry you can apply a coat of any clear floor varnish to give it depth and make it easy to wash.
Option B: You can use any colour oil based paint, (gloss, satin, matt etc) mixed with Owatrol Oil (about 3 parts Owatrol to 1 part Paint or 75% Owatrol and 25% paint) which makes the paint soak down into the wood for a tough non peel finish. (Objective here is to get the paint to soak in so add enough Owatrol oil to get the required penetration. If you so choose, you could apply a second coat after 24 hours but this time you will not need as much Owatrol oil – say about 30% or even less if you want extra paint film.
Unlike Option A, this will not require a clear coat as this finish will be washable.
Option C: Varnished floors can easily be painted without sanding. Here’s how… Wash properly and allow to dry. Using a clean, lint-free cloth apply a coat of ESP and allow a few hours to dry / cure.
We suggest you follow Option B above from there on for a tough, long lasting finish of whatever colour you want to use. Allow the paint a few days to dry and a week (minimum) to harden.


